Guides for new users and new organizations
Boathouse Connect is the premier tool for rowing organizations to manage their daily operations in the cloud. In order to get the maximum benefits of using Boathouse Connect, each athlete should have an account linked to their organization. In this guide, we will walk you through creating an account, getting linked to your organization, and getting all of your basic account setting squared away.
| 1 | Create an Account |
|---|---|
| 2 | Set Lineup Preferences |
| 3 | Join an Organization |
| 4 | Upload Profile Picture (optional) |
| 5 | Add USRowing Number (optional) |
| 6 | Join Groups (optional) |
The first step in joining your organization on Boathouse Connect is to create an account.
The first step in joining your organization on Boathouse Connect is to create an account.
When answering the lineup preferences on Step 2 of the Getting Started screen, you will choose between the following options:
By answering these questions as honestly as possible, your coach will have a better idea of where to place you in practice / regatta lineups. You can always change these answers as your skills improve from the My Profile -> Preferences -> Lineups page.
There are two different ways to join your organization:
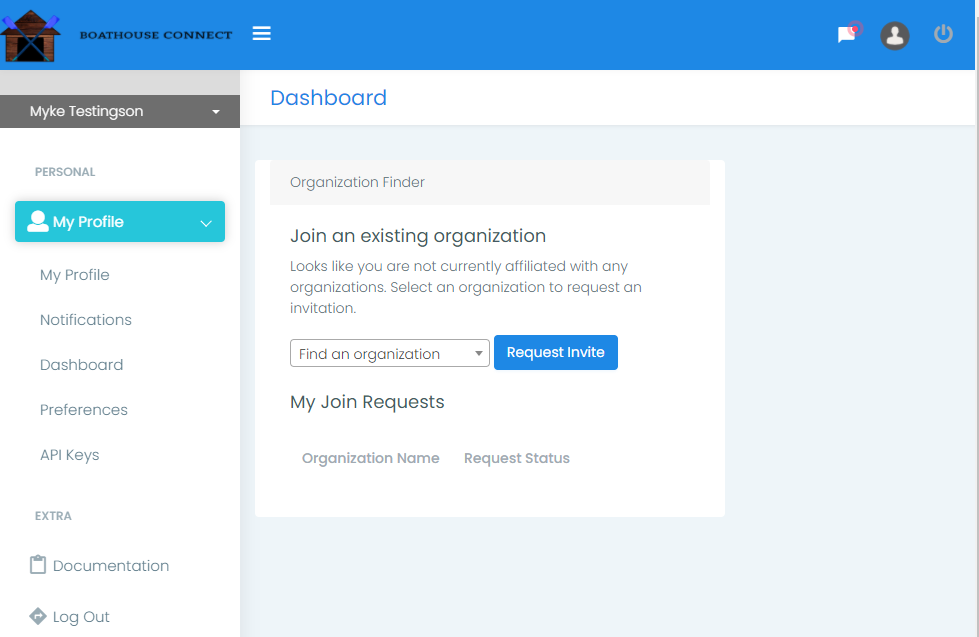
Using the Organization Finder widget on your dashboard (My Profile -> Dashboard), select your organization from the dropdown and click "Request Invite". Any user in your organization who is authorized to add new users can either Accept or Decline your request to join. All pending join requests can be viewed at the bottom of the widget along with the state of your request (Pending, Declined, or Accepted).
If your organization already knows that you need an account, and they have the email address that you used / are going to use to create your Boathouse Connect account with, they can pre-authorize you to join. If you have been pre-authorized to join, you will be automatically added to the organization once you create an account. If you create an account after being pre-authorized, you will also be automatically added to the organization. The only requirement to being pre-authorized to join an organization is that you use the same email address that the organization pre-authorizes you with. If you accidentally used a different email address, you can change your email address from the My Profile -> My Profile -> Contact Info page after you login.
If you are affiliated with multiple organizations, you can join each organization that you are affiliated with by requesting to join using the Organization Finder widget on your Dashboard (or being pre-authorized by the organization). If you become affiliated with multiple organizations, you can switch between them using the Org Switcher button next to your notifications icon on the top banner or by selecting the organization when you login.
This step can be completed either before or after you have joined an organization. Uploading a profile picture helps your coaches and teammates identify you a little easier (this is especially helpful when there are new people to the organization). If your organization manages lineups using Boathouse Connect, your profile picture will also display next to your seat.

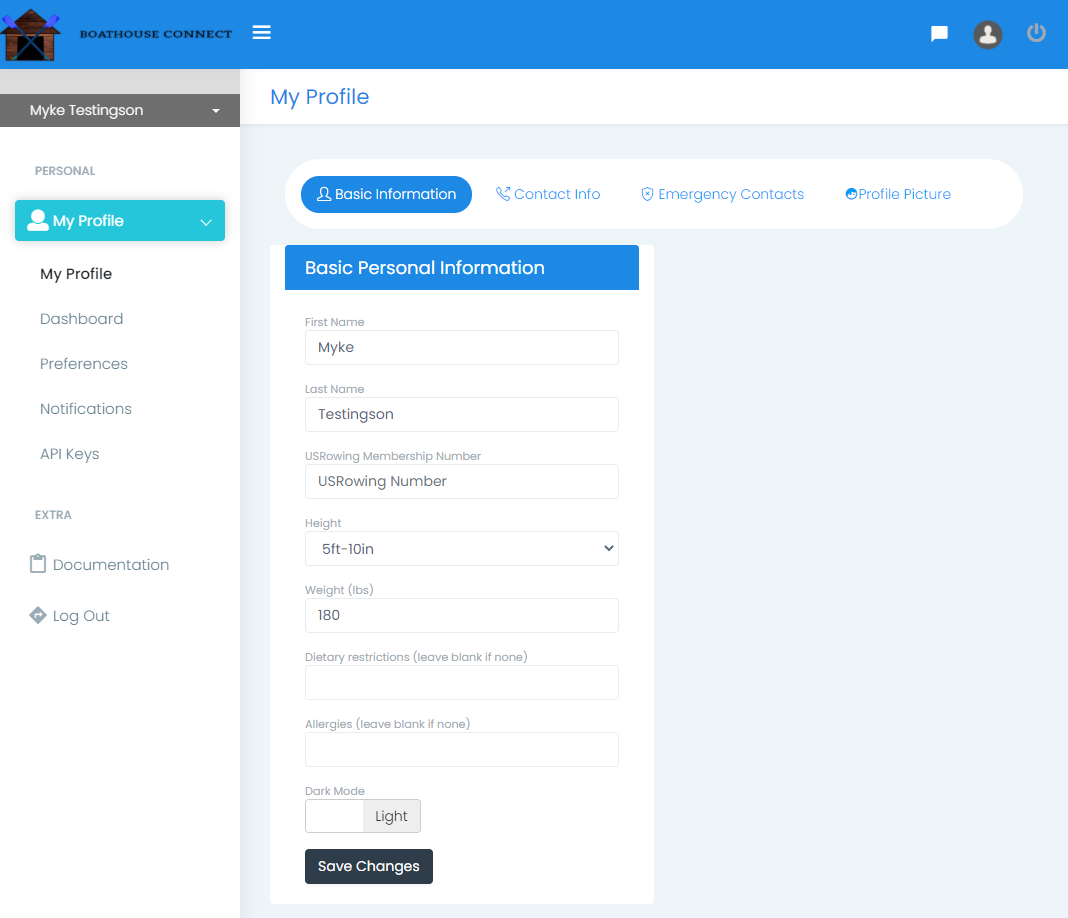
Adding your USRowing number (if you are a member) is very helpful to your coaches when they are planning lineups for a regatta. Any USRowing sanctioned / insured regatta requires each rower and coxswain to have an up-to-date liability waiver and USRowing membership in order to compete. If your organization is using the "Professional" Boathouse Connect subscription, your waiver and membership status are automatically updated for your coaches to track. To add your USRowing membership number:
Groups in Boathouse Connect are used to classify users, assign permissions, control who receives specific communications, set equipment checkout allowances, etc. Your organization can create groups for you to join based on your role in the organization. When a new group is created, the creator can specify whether or not users like yourself can join them by yourself (Self Join) or if you need approval to join the group. To see the groups you are eligible to join, go to Groups -> My Groups. Once there, you will see a list of all of the groups in the organization as well as which ones you are a member of, and which ones you are allowed to join. If you want to join a group that has "Self-Join Allowed" set to "No", you can click the "Request To Join" button and a user who is authorized to add users to groups will add you to the group.
If you have additional questions beyond what was listed in this Getting Started guide, feel free to reach out to us using our Contact Form or by directly contacting your organization.
Happy Rowing!
Boathouse Connect is the premier tool for rowing organizations to manage their daily operations in the cloud. In order to get the maximum benefits of using Boathouse Connect, we recommend following this Getting Started guide to help your organization get up and running quickly on our platform. We strongly recommend completing these 5 steps before inviting your members to create accounts.
| 1 | Create Organization Account |
|---|---|
| 2 | Select Subscription Plan |
| 3 | Upload Logo |
| 4 | Set Proper Timezone |
| 5 | Follow New Organization Checklist |
The first step in adopting Boathouse Connect is to create an account for your organization.
After selecting your organization from the dropdown, you will be prompted to create your personal Boathouse Connect account. Please fill out the next remaining screens with your personal information. You can follow the New User Getting Started Guide for assistance
Boathouse Connect offers 3 different subscription plans for organizations:
Information about each plan can be found on our Pricing page. The remainder of this guide will be applicable regardless of the plan your organization is using.
After Login, go to the organization subscription settings page Org Settings -> Subscription. Once there, you will see your organization's current subscription and billing information. By default, all new organizations start on the Professional ($20/month) plan with a 30 day free-trial. Changes to the subscription plan take effect immediately.
To avoid interruption of services after the 30 day free-trial expires, we recommend adding a credit/debit card to your account using the "Add payment method" box at the bottom of the Subscription page.
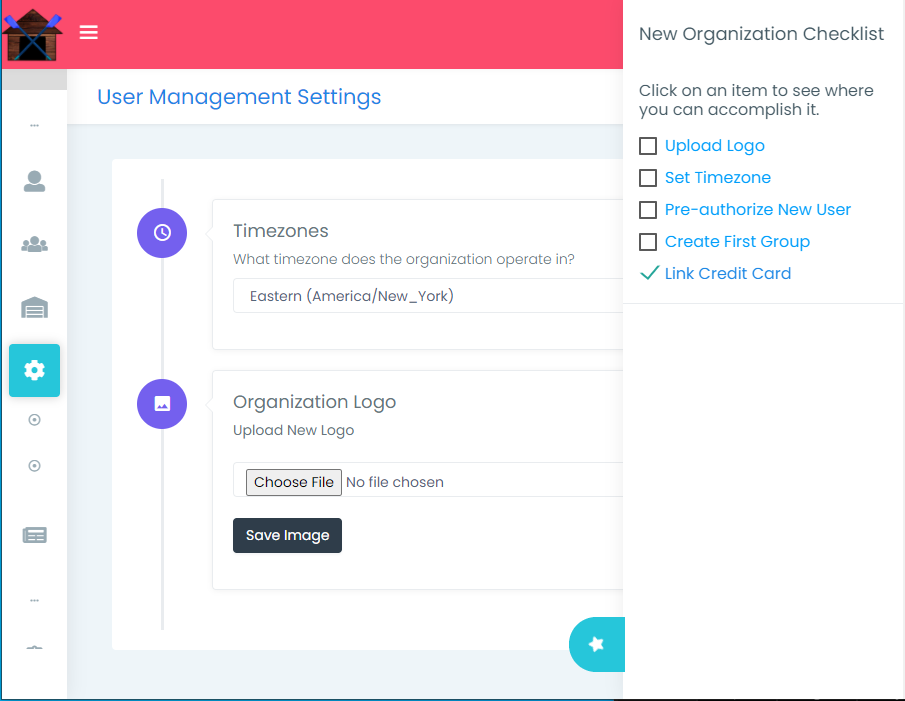
Uploading your organization's logo helps your users who might be affiliated with multiple organizations keep track of which organization they are currently logged into. To upload a logo, go to Org Settings -> General -> Organization Logo and choose an image to upload. After uploading an image, you will see the logo at the top of the left-navigation bar. If you don't like how the logo appears or want to upload a different logo, you can always come back to this page to change out the logo.
To set the correct timezone for your organization, go to Org Settings -> General -> Timezones and select the timezone from the dropdown menu. This is located on the same page, just above the Organization Logo section.
To finish getting the organization account ready for members to join, we recommend following the "New Organization Checklist". The checklist can be accessed by clicking the light blue button with the rotating star at the bottom of the screen. The checklist will remain visible to all users affiliated with the organization until all items have been completed. We strongly recommend completing all of the items before inviting general members to join the organization.